Some workshops already run a small Kubernetes cluster: k3s on a couple of mini-PCs, MicroK8s on a server, a homelab that grew. If that's you, the local agent fits right in: one Secret with its keys and a Deployment with a single replica.
- Nothing to edit: BolloPrint gives you the manifest with the keys already in.
- No Service, no Ingress, no open ports: the agent calls BolloPrint, never the other way round.
- It updates itself, without you changing the manifest.
💡 Not running Kubernetes already?
Don't set it up just for the agent. Docker, or your device's own package, gives you exactly the same with fewer moving parts. All the options are in the local agent.
What you need
- A cluster and
kubectlaccess to it. - A node on the same network as the printers. The agent uses the node's
network (
hostNetwork) to find them, so a pod scheduled on a node in another network still works, but you'll add printers by IP. If your nodes sit on different networks, pin the Deployment to the right one with anodeSelector. - For the persistent volume (below), a default StorageClass.
It's lightweight: the manifest reserves 256 MB of memory for it and caps it at 512 MB. The image runs on Intel/AMD and ARM nodes, Raspberry Pis included.
1. Create the agent in BolloPrint
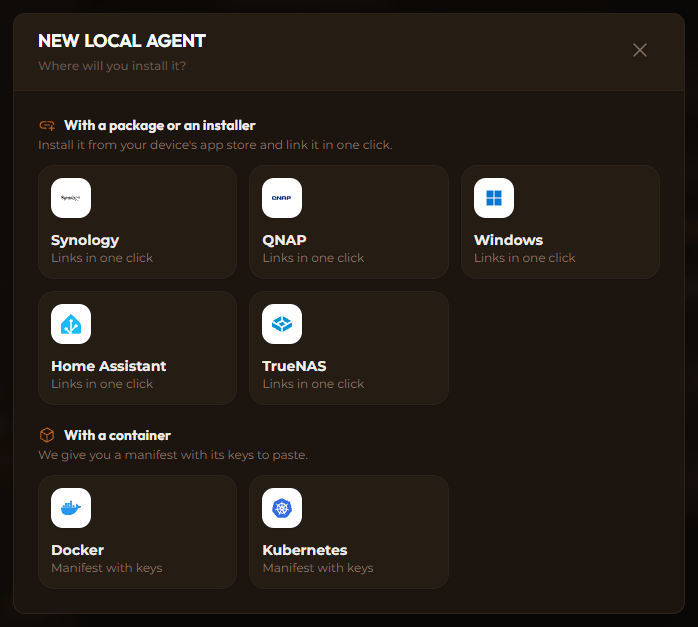
Go to Settings → Printers, open the Local agent tab and click New agent. Pick Kubernetes, under With a container, give it a name (where it is, not what it is) and click Create agent.
2. Copy the manifest
Switch to the Kubernetes tab. You get a Secret called bolloprint-agent
with the agent's two keys, and a Deployment of the same name with one replica,
the Recreate strategy (never two pods at once), no privileges and the node's
network.
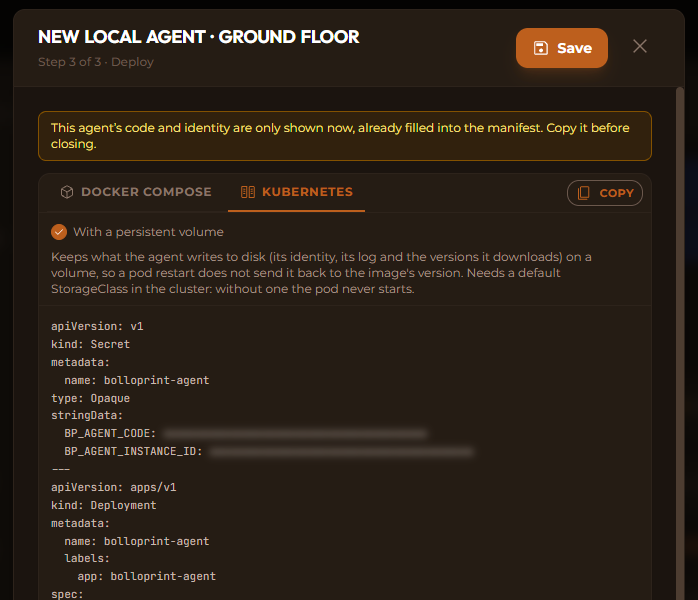
With a persistent volume adds a small PersistentVolumeClaim. Tick it if your cluster has a default StorageClass: the agent keeps the versions it downloads there, so a pod restart doesn't send it back to the image's version for a few minutes. Leave it unticked if there's no default StorageClass, or the pod waits for a volume that never comes and never starts.
Click Copy, keep the manifest somewhere safe, and Save.
🔐 The keys are only shown once
We don't store them. If you lose the manifest, open the agent with Edit, go to Deployment and click Regenerate keys.
3. Apply it
Save it as bolloprint-agent.yaml and apply it:
kubectl apply -f bolloprint-agent.yaml
The manifest has no namespace, so it lands in your current one. If you'd rather keep it apart:
kubectl create namespace bolloprint
kubectl apply -n bolloprint -f bolloprint-agent.yaml
4. Check that it's online
In less than a minute, the agent goes from Not installed to Online in the Local agent tab. If it doesn't:
kubectl get pods -l app=bolloprint-agent
kubectl logs deployment/bolloprint-agent --tail 50
A pod stuck in Pending is nearly always the persistent volume with no default StorageClass. Copy the manifest again without the box ticked, or create the StorageClass.
<!-- SCREENSHOT: 04-online.png — BolloPrint (English UI, dark theme), Settings → Printers → Local agent: an agent with the Kubernetes logo Online, with the node's name and its version. Needs that real cluster connected to the dev workshop. --> <!-- PENDING (uncomment when the screenshot exists):  -->From here, your printers show up by themselves, ready to Add: the rest is in connect your printers over your own network.
Updates
The agent updates itself since version 2026.1.1, never while one of its
printers is printing. If BolloPrint ever asks you to update by hand, change only
the version on the image: line and apply again, or in one go:
kubectl set image deployment/bolloprint-agent agent=ghcr.io/bolloprint/bolloprint-agent:<version>
(If you do that, change your file as well, or the next apply takes you back.)
The version to use is the one in the agent's Deployment tab.
⚠️ Don't apply the Deployment tab's manifest over yours
For an agent that already exists it carries CHANGE_ME instead of the keys, and your Secret would end up with that. Change only the image version.
Good to know
- Don't scale it up. One agent is one pod. Two replicas are two agents with the same keys fighting over one connection. To split a big fleet, create a second agent in BolloPrint.
- After regenerating the keys, restart the pod. Applying the new manifest
changes the Secret, but a running pod doesn't read it again by itself:
kubectl rollout restart deployment/bolloprint-agent. - Moving within the cluster needs nothing: the identity is in the Secret, so a rescheduled pod is the same agent. To move to another cluster, delete the Deployment in the old one first, then apply the same file in the new one.
- To remove it, delete it in BolloPrint (⋮ → Delete) and run
kubectl delete -f bolloprint-agent.yaml. - Helm or Argo CD are fine, as long as what reaches the cluster is the same thing: a Secret with the two keys and a one-replica Deployment. Keep the keys wherever you keep your other secrets, never in a public repository.
💡 Need help?
Write to us from the contact page or on
our Discord, with the last lines of
kubectl logs deployment/bolloprint-agent.
Related documentation
- Agent on Kubernetes: every step and every detail
- The local agent: which installation suits you
- Printers on the local network: adding your printers